
OS개발 - Interrupt
Interrupt
Interrupt를 구현하고, interrupt 기반으로 시간을 나타내는 타이머인 PIT를 다루는 간단한 driver를 만들어 보았다. OSDev의 Interrupt Tutorial와 Olivestem 채널의 동영상들을 참고하면서 진행하였다.
x86 아티텍쳐에서 interrupt는 IDT라는 자료구조와 PIC라는 디바이스를 이용해 구현된다. PIC에서 다른 디바이스로부터 입력을 받고, 해당 입력을 interrupt request(IRQ)로 전환해 CPU에 전달한다. CPU는 IRQ를 수신한 이후, interrupt를 발생시킨다. 이때, 해당 interrupt에 대응되는 interrupt service routine(ISR)을 실행하게 되는데 interrupt와 ISR과의 대응관계를 기록해둔 자료구조가 interrupt descriptor table이다. Context switching이 일어나고 대응되는 ISR이 실행되며, ISR이 종료되면 다시 context switching을 통해 원래의 context로 돌아오게 된다.
Interrupt Descriptor Table (IDT)
IDT는 다음과 같은 entry들로 구성되어 있다.
struct idt_entry {
  uint16_t isr_low;
  uint16_t kernel_cs;
  uint8_t reserved;
  uint8_t attributes;
  uint16_t isr_high;
} __attribute__((packed));
이 8바이트짜리 entry는, offset, selector, gate type, privilege level, present bit의 정보를 담고 있다. Offset은 해당 interrupt가 발생하였을 때 실행할 isr의 주소이다. Selector은 isr이 실행될 코드 세그먼트(kernel code, 0x08)이다. Gate type은 해당 idt entry가 user space에서 발생한 trap인지, h/w에서 발생한 interrupt인지 구분하는 인자이다. Privilege level은 CPU의 ring level을 나타낸다. Present bit은 해당 interrupt가 현재 사용 중인지를 나타내는 것이다.
IDT는 다음과 같이 초기화 한다.
#include "idt.h"
#include "pic.h"
#include <kernel/interrupt.h>
#include <stdint.h>
#include <string.h>

__attribute__((aligned(0x10))) struct idt_entry idtEntries[IDT_ENTRY_N];
struct idt_ptr idtPtr;
extern void idt_flush(uint32_t);

void initIdt() {
  idtPtr.base = (uint32_t)&idtEntries;
  idtPtr.limit = (sizeof(struct idt_entry) * IDT_ENTRY_N) - 1;
  memset(&idtEntries, 0, sizeof(struct idt_entry) * IDT_ENTRY_N);

  // internal interrupts
  setIdtDescriptor(0, (uint32_t)isr0, 0x8E);
  setIdtDescriptor(1, (uint32_t)isr1, 0x8E);
  setIdtDescriptor(2, (uint32_t)isr2, 0x8E);
  setIdtDescriptor(3, (uint32_t)isr3, 0x8E);
  setIdtDescriptor(4, (uint32_t)isr4, 0x8E);
  setIdtDescriptor(5, (uint32_t)isr5, 0x8E);
  setIdtDescriptor(6, (uint32_t)isr6, 0x8E);
  setIdtDescriptor(7, (uint32_t)isr7, 0x8E);
  setIdtDescriptor(8, (uint32_t)isr8, 0x8E);
  setIdtDescriptor(9, (uint32_t)isr9, 0x8E);
  setIdtDescriptor(10, (uint32_t)isr10, 0x8E);
  setIdtDescriptor(11, (uint32_t)isr11, 0x8E);
  setIdtDescriptor(12, (uint32_t)isr12, 0x8E);
  setIdtDescriptor(13, (uint32_t)isr13, 0x8E);
  setIdtDescriptor(14, (uint32_t)isr14, 0x8E);
  setIdtDescriptor(15, (uint32_t)isr15, 0x8E);
  setIdtDescriptor(16, (uint32_t)isr16, 0x8E);
  setIdtDescriptor(17, (uint32_t)isr17, 0x8E);
  setIdtDescriptor(18, (uint32_t)isr18, 0x8E);
  setIdtDescriptor(19, (uint32_t)isr19, 0x8E);
  setIdtDescriptor(20, (uint32_t)isr20, 0x8E);
  setIdtDescriptor(21, (uint32_t)isr21, 0x8E);
  setIdtDescriptor(22, (uint32_t)isr22, 0x8E);
  setIdtDescriptor(23, (uint32_t)isr23, 0x8E);
  setIdtDescriptor(24, (uint32_t)isr24, 0x8E);
  setIdtDescriptor(25, (uint32_t)isr25, 0x8E);
  setIdtDescriptor(26, (uint32_t)isr26, 0x8E);
  setIdtDescriptor(27, (uint32_t)isr27, 0x8E);
  setIdtDescriptor(28, (uint32_t)isr28, 0x8E);
  setIdtDescriptor(29, (uint32_t)isr29, 0x8E);
  setIdtDescriptor(30, (uint32_t)isr30, 0x8E);
  setIdtDescriptor(31, (uint32_t)isr31, 0x8E);
  setIdtDescriptor(32, (uint32_t)isr32, 0x8E);

  initPic(0x20, 0x28);

  idt_flush((uint32_t)&idtPtr);
}

void setIdtDescriptor(uint8_t vector, uint32_t isr, uint8_t flags) {
  struct idt_entry *descriptor = &idtEntries[vector];

  descriptor->isr_low = isr & 0xFFFF;
  descriptor->kernel_cs = 0x08;
  descriptor->attributes = flags;
  descriptor->isr_high = isr >> 16;
  descriptor->reserved = 0;
}

void initInterrupt() { initIdt(); }
IDT를 초기화한 이후에는 lidt 명령어를 사용하여 IDT를 레지스터에 등록시켜야 한다. 이 작업을 마친 후에야 CPU가 IDT를 참조하여 interrupt를 처리하기 시작한다.
.global idt_flush
idt_flush:
	movl 4(%esp), %eax
	lidtl (%eax)
	sti
	ret
Programmable Interrupt Controller (PIC)
PIC는 외부 디바이스(키보드, 마우스, 타이머 등)으로부터 IRQ를 수신하여, 이들을 프로세서에게 순차적으로 전달하는 역할을 한다. PIC는 8개의 회선을 가지고 있다. 따라서 한 PIC는 총 8 종류의 IRQ를 처리할 수 있다. 보통 PIC는 두개를 직렬(cascade)로 연결하여 사용하는데, 한 PIC(slave)의 출력을 다른 PIC(master)의 입력 회선에 연결하여 사용한다. 따라서, master의 회선 중 하나는 slave의 입력을 처리하느라 소모된다. 따라서 두개의 PIC를 직렬로 연결한 시스템에서는 총 15 종류의 IRQ가 발생한다.
프로세서가 IRQ를 수신하기 위해서는 PIC를 초기화해 줄 필요가 있다. PIC는 I/O port를 통해 연결되어 있는데, 총 두개의 포트(command, data)를 점유한다. Master은 0x20포트와 0x21 포트를 각각 command 포트와 data포트로 사용한다. Slave는 0xA0포트와 0xA1 포트를 각각 command 포트와 data포트로 사용한다. 해당 포트를 통하여 아래와 같이 초기화를 진행한다.
void initPic(int masterOffset, int slaveOffset) {
  // start initialization
  outb(PIC1_COMMAND, ICW1_INIT | ICW1_ICW4);
  outb(PIC2_COMMAND, ICW1_INIT | ICW1_ICW4);

  // set interrupt offset
  outb(PIC1_DATA, masterOffset);
  outb(PIC1_DATA, slaveOffset);

  // tell about cascade
  outb(PIC1_DATA, 4);
  outb(PIC2_DATA, 2);

  // tell which mode is used
  outb(PIC1_DATA, ICW4_8086);
  outb(PIC2_DATA, ICW4_8086);

  // unmask
  outb(PIC1_DATA, 0);
  outb(PIC2_DATA, 0);
}
초기화가 시작된다는 것을 command 포트를 통해 전달한 이후, interrupt에 사용할 offset을 전달한다. 이 offset은 IRQ를 interrupt로 바꾸는데 사용되는데, 0번 IRQ는 offset+0 번 interrupt로 바뀌는 식이다. 0~31번 interrupt들은 intel 프로세서가 선점하였기에, PIC가 발생하는 IRQ들은 32(0x20)번 interrupt부터 사용하게 된다. 따라서, master와 slave에게 각각 0x20과 0x28의 offset을 전달한다. Cascade하여 두개의 PIC를 연결해 사용한다는 점, 또한 master(0000 0100)와 slave(0000 0010)에 각각 전달한다. 8086 모드를 사용한다는 점을 전달한 이후, PIC에 설정되어 있는 마스크를 0000 0000으로 초기화한다. 해당 마스크에 1이 설정되면 해당 비티의 IRQ는 발생하지 않는다.
매 IRQ를 처리한 이후, PIC에게 해당 IRQ가 처리되었다는 것을 통지해주어야 한다.
void picEnd(int irq) {
  if (irq >= 8) {
    outb(PIC2_COMMAND, PIC_EOI);
  }

  outb(PIC1_COMMAND, PIC_EOI);
}
Interrupt Service Routine (ISR)
Interrupt가 발생하면, 프로세서는 IDT를 참조하여 해당하는 ISR를 실행시킨다.
ISR을 구현은 다른 부분들에 비해 상대적으로 자유롭다. 나는 어셈블리 매크로를 이용하여, 각 interrupt에 대응하는 isr 레이블(isr\N, IDT에 기록한 것)을 모두 하드코딩하여 어셈블리 파일에 구현하였다. 해당 레이블들에서는, 나중에 general한 handler로 넘어가서 활용할 수 있도록 interrupt number을 스택에 저장하는 역할과 general한 handler (isr_common_stub)를 호출하는 간단한 코드가 위치해 있다. isr_common_stub에서는 이전의 context를 저장하고 C코드로 작성된 handler(exception_handler)를 호출하고, handler가 종료된 이후 이전의 context를 복원하는 작업을 수행한다.
isr_common_stub:
    pushal
    movw %ds, %ax
    pushl %eax
    movl %cr2, %eax
    pushl %eax

    movw $0x10, %ax
    movw %ax, %ds
    movw %ax, %es
    movw %ax, %fs
    movw %ax, %gs

    pushl %esp
    call exception_handler

    addl $0x8, %esp
    popl %ebx
    movw %bx, %ds
    movw %bx, %es
    movw %bx, %fs
    movw %bx, %gs

    popal
	addl $0x8, %esp
	sti
	iret

.macro isr_stub num
.global isr\num
isr\num:
    cli
	pushl $0
	pushl $\num
    jmp isr_common_stub
.endm

.extern exception_handler
isr_stub 0
isr_stub 1
isr_stub 2
isr_stub 3
isr_stub 4
isr_stub 5
isr_stub 6
isr_stub 7
isr_stub 8
isr_stub 9
isr_stub 10
isr_stub 11
isr_stub 12
isr_stub 13
isr_stub 14
isr_stub 15
isr_stub 16
isr_stub 17
isr_stub 18
isr_stub 19
isr_stub 20
isr_stub 21
isr_stub 22
isr_stub 23
isr_stub 24
isr_stub 25
isr_stub 26
isr_stub 27
isr_stub 28
isr_stub 29
isr_stub 30
isr_stub 31
isr_stub 32
exception_handler에서는 32번 미만의 interrupt(CPU에서 발생한)와 32번 이상의 interrupt(외부에서 발생한)를 구분하여 각각 isr_handler와 irq_handler을 호출하여 처리한다. isr_handler에서는 알맞은 경고 메세지를 출력한 이후, 프로세스를 종료(abort())시킨다. irq_handler에서는 해당 IRQ에 대응되는 미리 등록해두었던 handler를 호출하게 된다. irq_handler에서는 대응되는 handler의 작업이 끝난 이후 picEnd()를 호출하여 pic에게 다른 IRQ를 수신할 준비가 되었다는 점을 알린다.
#include "isr.h"
#include "../io/io.h"
#include "pic.h"
#include <stdint.h>

/* To print the message which defines every exception */
char *exception_messages[] = {"Division By Zero",
                              "Debug",
                              "Non Maskable Interrupt",
                              "Breakpoint",
                              "Into Detected Overflow",
                              "Out of Bounds",
                              "Invalid Opcode",
                              "No Coprocessor",

                              "Double Fault",
                              "Coprocessor Segment Overrun",
                              "Bad TSS",
                              "Segment Not Present",
                              "Stack Fault",
                              "General Protection Fault",
                              "Page Fault",
                              "Unknown Interrupt",

                              "Coprocessor Fault",
                              "Alignment Check",
                              "Machine Check",
                              "Reserved",
                              "Reserved",
                              "Reserved",
                              "Reserved",
                              "Reserved",

                              "Reserved",
                              "Reserved",
                              "Reserved",
                              "Reserved",
                              "Reserved",
                              "Reserved",
                              "Reserved",
                              "Reserved"};

void exception_handler(struct isr_regs *regs) {
  int intNo = regs->int_no;
  if (intNo < NRESERVED) {
    isrHandler(intNo, regs);
  } else {
    irqHandler(intNo - NRESERVED, regs);
  }
}

void isrHandler(uint8_t no, struct isr_regs *regs) {
  printf(exception_messages[no]);
  abort();
}

isr_t irqHandlers[16] = {};

uint32_t installIrqHandler(uint8_t isrNo, isr_t handler) {
  int idx = isrNo - NRESERVED;
  irqHandlers[idx] = handler;

  return (uint32_t)irqHandlers[idx];
}

void irqHandler(uint8_t no, struct isr_regs *regs) {
  irqHandlers[no](regs);
  picEnd(no);
}
Programmable Interrupt Timer (PIT)
PIT 칩은 정해진 주기에 따라 펄스를 PIC에 발생시켜 IRQ를 일으킨다. 이 PIT는 기본적으로 14.31818 MHz의 주파수로 동작한다. 해당 주파수를 나눠서 더 느리게 펄스를 발생시켜 tick 발생 주기를 조절할 수 있다. 이 PIT는 PIC의 IRQ0을 사용한다. PIT의 tick 발생 주기를 설정하고 IRQ0의 handler를 등록시키는 코드는 다음과 같다.
#include "timer.h"
#include <kernel/timer.h>

#include "../interrupt/isr.h"
#include "../io/io.h"

#include <stdio.h>
#include <string.h>

uint32_t tick, nprint = 0;

#define THRESHOLD 100

static void timerCallback(struct isr_regs *regs) {
  ++tick;
  printf("ticked");
}

void initTimer(uint32_t freq) {
  __asm__ volatile("cli");

  installIrqHandler(IRQ0, timerCallback);

  tick = 0;

  uint32_t divisor = 119318 / freq;

  outb(0x43, 0x36);
  outb(0x40, (uint8_t)(divisor & 0xFF));
  outb(0x40, (uint8_t)((divisor >> 8) & 0xFF));
  __asm__ volatile("sti");
}
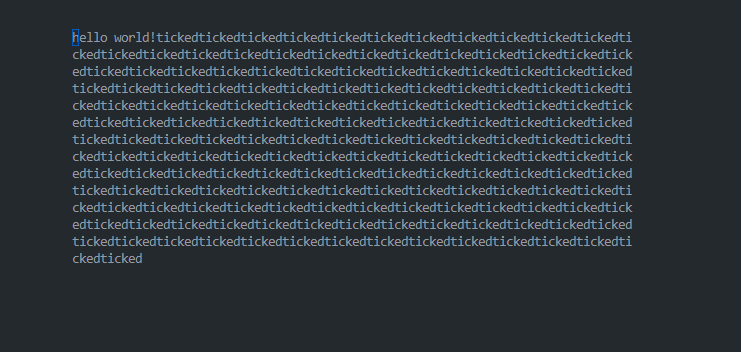
다음과 같이 PIT의 IRQ handling이 잘 이루어지는 것을 확인할 수 있다.
후기
시행착오
어셈블리어 작성이 익숙치 않아서 많은 실수를 했다. 대부분의 디버깅은 어셈블리어 오류를 찾는데 할애하였다. 크게 어려운 작업이 아닌데 불구하고 시간을 많이 잡아먹었다.
다음 작업
앞으로 키보드 드라이버 구현을 할 예정이다. 이후에는 페이징 및 멀티테스크 구현을 진행할 것이다.